BlogATAhon2021

TestNG is a testing framework for the Java programming language created by Cédric Beust and inspired by JUnit and NUnit.
Design goal of TestNG is to cover a wider range of test categories:
Unit, functional, end-to-end, integration, etc., with more powerful and easy-to-use functionalities.
TestNG :

• TestNG stands for Test Next Generation.
• It influenced JUnit to include more concepts in JUnit 4.
• It can create test scripts, execute test scripts, generate test reports, and generate logs.
• It can perform data-driven testing, cross-browser testing, and integration testing.
TestNG features :
Support parallel testing, integration testing, dependency testing, data-driven testing, cross-browser testing, and end-to-end testing.
Test framework :
• A pattern for writing and running test scripts. The purpose is to monitor the testing and development of an Application Under Test (AUT).
• Different from an automation design framework.
• Simplify the process of testing by giving power to developers and automation engineers to write a quick test.
• We can add an annotation and assert statement then start our test. We also have the ability to run our tests as a collection in a test suite.
Some of the core functions within a test framework include :
• Creating and executing test scripts.
• Generating test reports.
• Generating logs.
• Reading and writing test data.
TestNG Annotations :
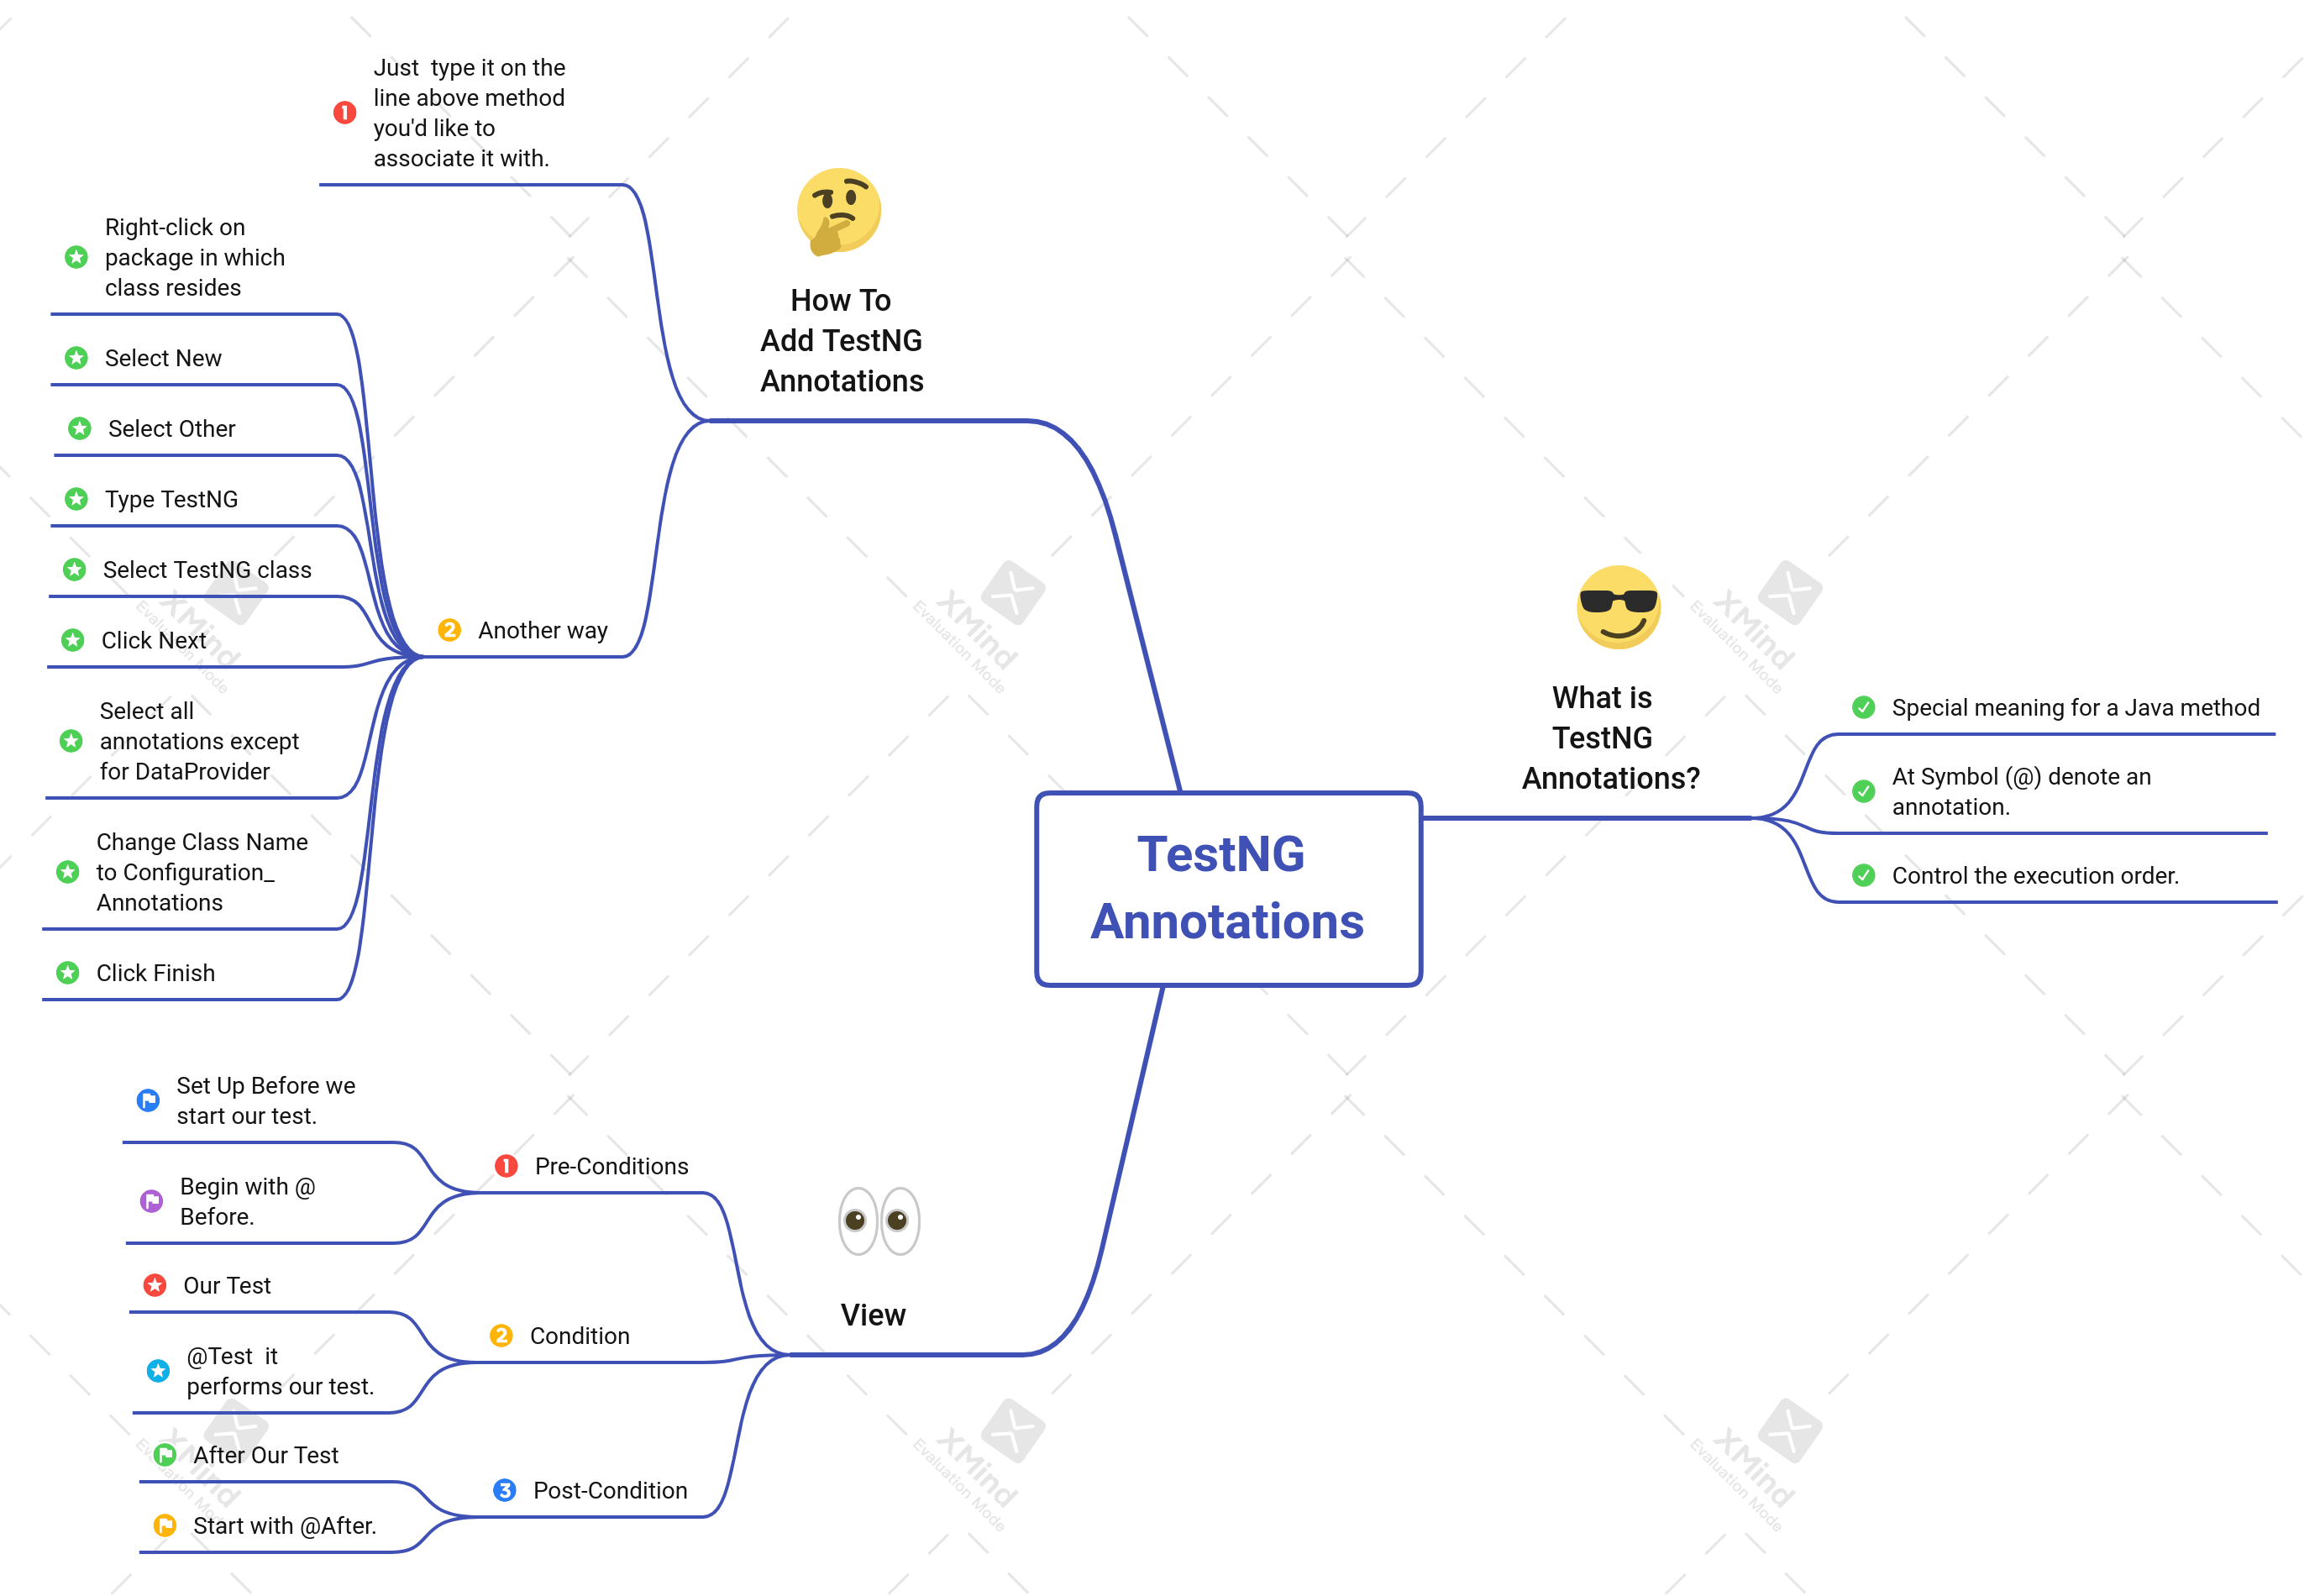
• A TestNG annotation is data that has a special meaning for a Java method.
• At Symbol (@)these denote an annotation.
• It provides information about how the annotation will control the execution order.
View of TestNG annotations : Pre-Conditions, Conditions, and Post-Conditions.
Notice the @ symbol (or @ sign). This is short for at a rate which is an accounting term. This symbol is placed in front of every TestNG annotation.
1. Pre-Conditions :
• Must be set up before we start our test.
• All of the pre-conditions begin with @Before.
2. Condition :
• Our Test
• @Test is a key annotation because it performs our test.
3. Post-Condition :
• After Out Test
• Post-Conditions that all start with @After.
How To Add TestNG Annotations :
To add an annotation is just to type it on the line above the method you’d like to associate it with.
After typing it, you’ll need to import the annotation if it’s the first time you’re using it in this class. A shortcut for importing and organizing our imports is CTRL + SHIFT + O. (If you want to see a list of Eclipse shortcuts select CTRL + SHIFT + L and we see a lot of shortcuts including Organize Imports.)
Another way to add TestNG annotations :
1. Right-click on the package in which the class resides.
2. Select New.
3. Select Other.
4. Type TestNG.
5. Select TestNG class.
6. Click Next.
7. Select all of the annotations except for DataProvider .
8. Change the Class Name to Configuration_Annotations.
9. Click Finish.
TestNG XML Files :
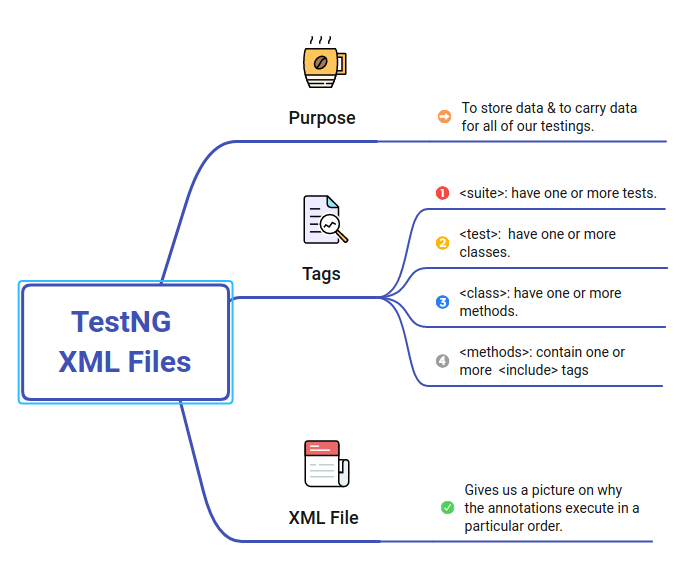
Purpose:
To store data and to carry data for all of our testings.
In this example, we see the following tags:
• <suite> : A <suite> can have one or more tests.Appears first in a TestNG xml file
• <test> : A <test> can have one or more classes.
• <class> : A <class> can have one or more methods.
• <methods> : A <methods>can contain one or more <include> tags
The XML file gives us a picture of why the annotations execute in a particular order.
If we run our test suite, we see the same output as before. It’s the same output because this execution has one <test> tag.
This time our execution does not immediately sign back into the application after signing out of the application. Now, the execution processes @AfterClass (Close Test Application) and @AfterTest (Close Chrome) after signing out. Why?
Because in the XML file, the test methods are not included the same <class> tag. Therefore, execution will not sign back in to start our next test.
Notice : Chrome is still set up after executing @BeforeSuite. That means the @AfterSuite annotation is the only annotation that has not been executed after the first test. It is only executed after both tests have been completed.
In reality, we probably would not use four Before configuration annotations and four After configuration annotations. However, I wanted you to see how the XML file is connected to the annotations and how the XML file allows us to execute the same methods for one test compared to more than one test.
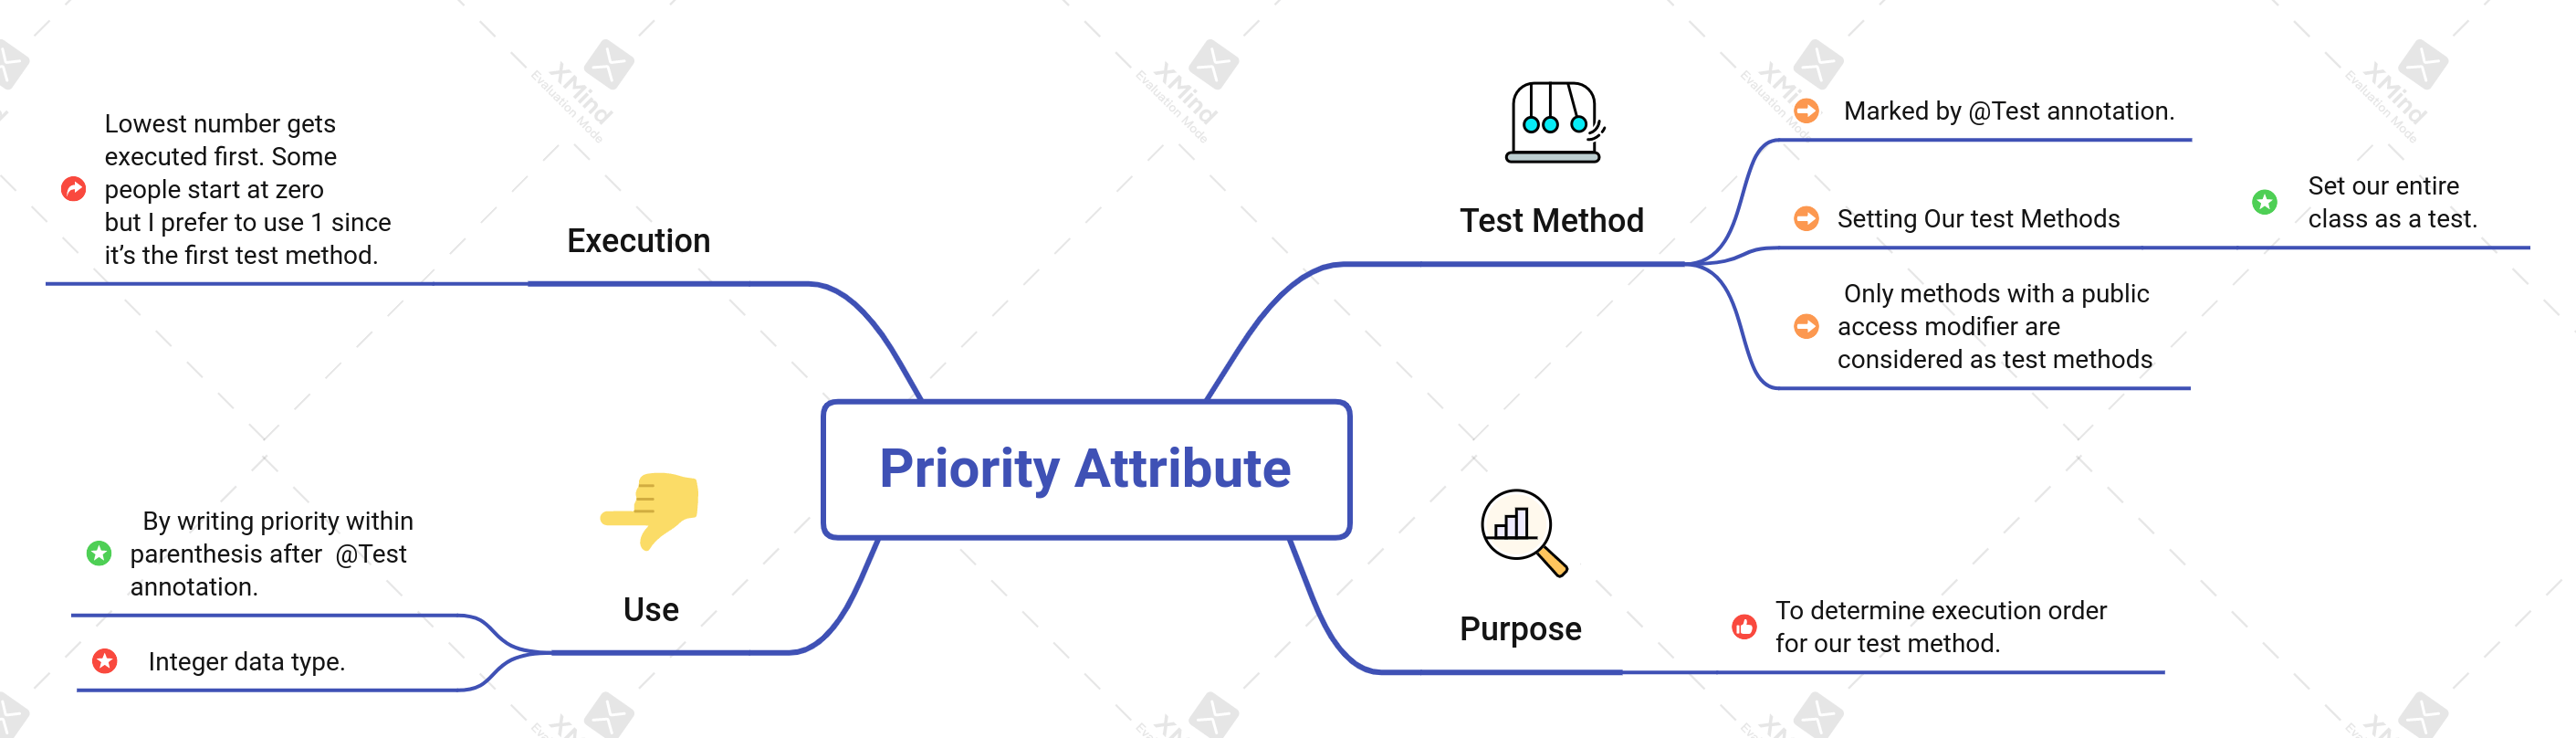
Priority Attribute :
Default Execution Order for Test Methods :
A test method is marked by the @Test annotation. In addition to setting our methods as tests, we can also set our entire class as a test.
In this example, I marked the class as part of the TestNG tests by adding a @Test annotation at the class level.
Let’s add setUp and tearDown methods with configuration annotations.
Methods with no annotations : signIn, searchTShirt, and signOut.
Looking at this layout, it seems the execution order should be:
1. setUp
2. signIn
3. searchTShirt
4. signOut
5. tearDown
• We can place the test methods anywhere in the editor and it will run in the same order every time because the Test annotations identify the test methods.
• Ascending numerical order TestNG execute test methods that contain a priority attribute.
Priority Attributes For Test Methods :
The @Test annotation has a lot of attributes. We can see those attributes by going to the TestNG Library -> TestNG jar file -> org.testng -> annotations, then scroll down to the Test.class and expand.
Priority attribute Purpose :
• To determine the execution order for our test method.
• Use a priority attribute by writing priority within parenthesis after the @Test annotation.
• Priority attribute uses an Integer data type.
• The lowest number gets executed first. Some people start at zero but I prefer to use 1 since it’s the first test method.
Intro to TestNG Assertions :
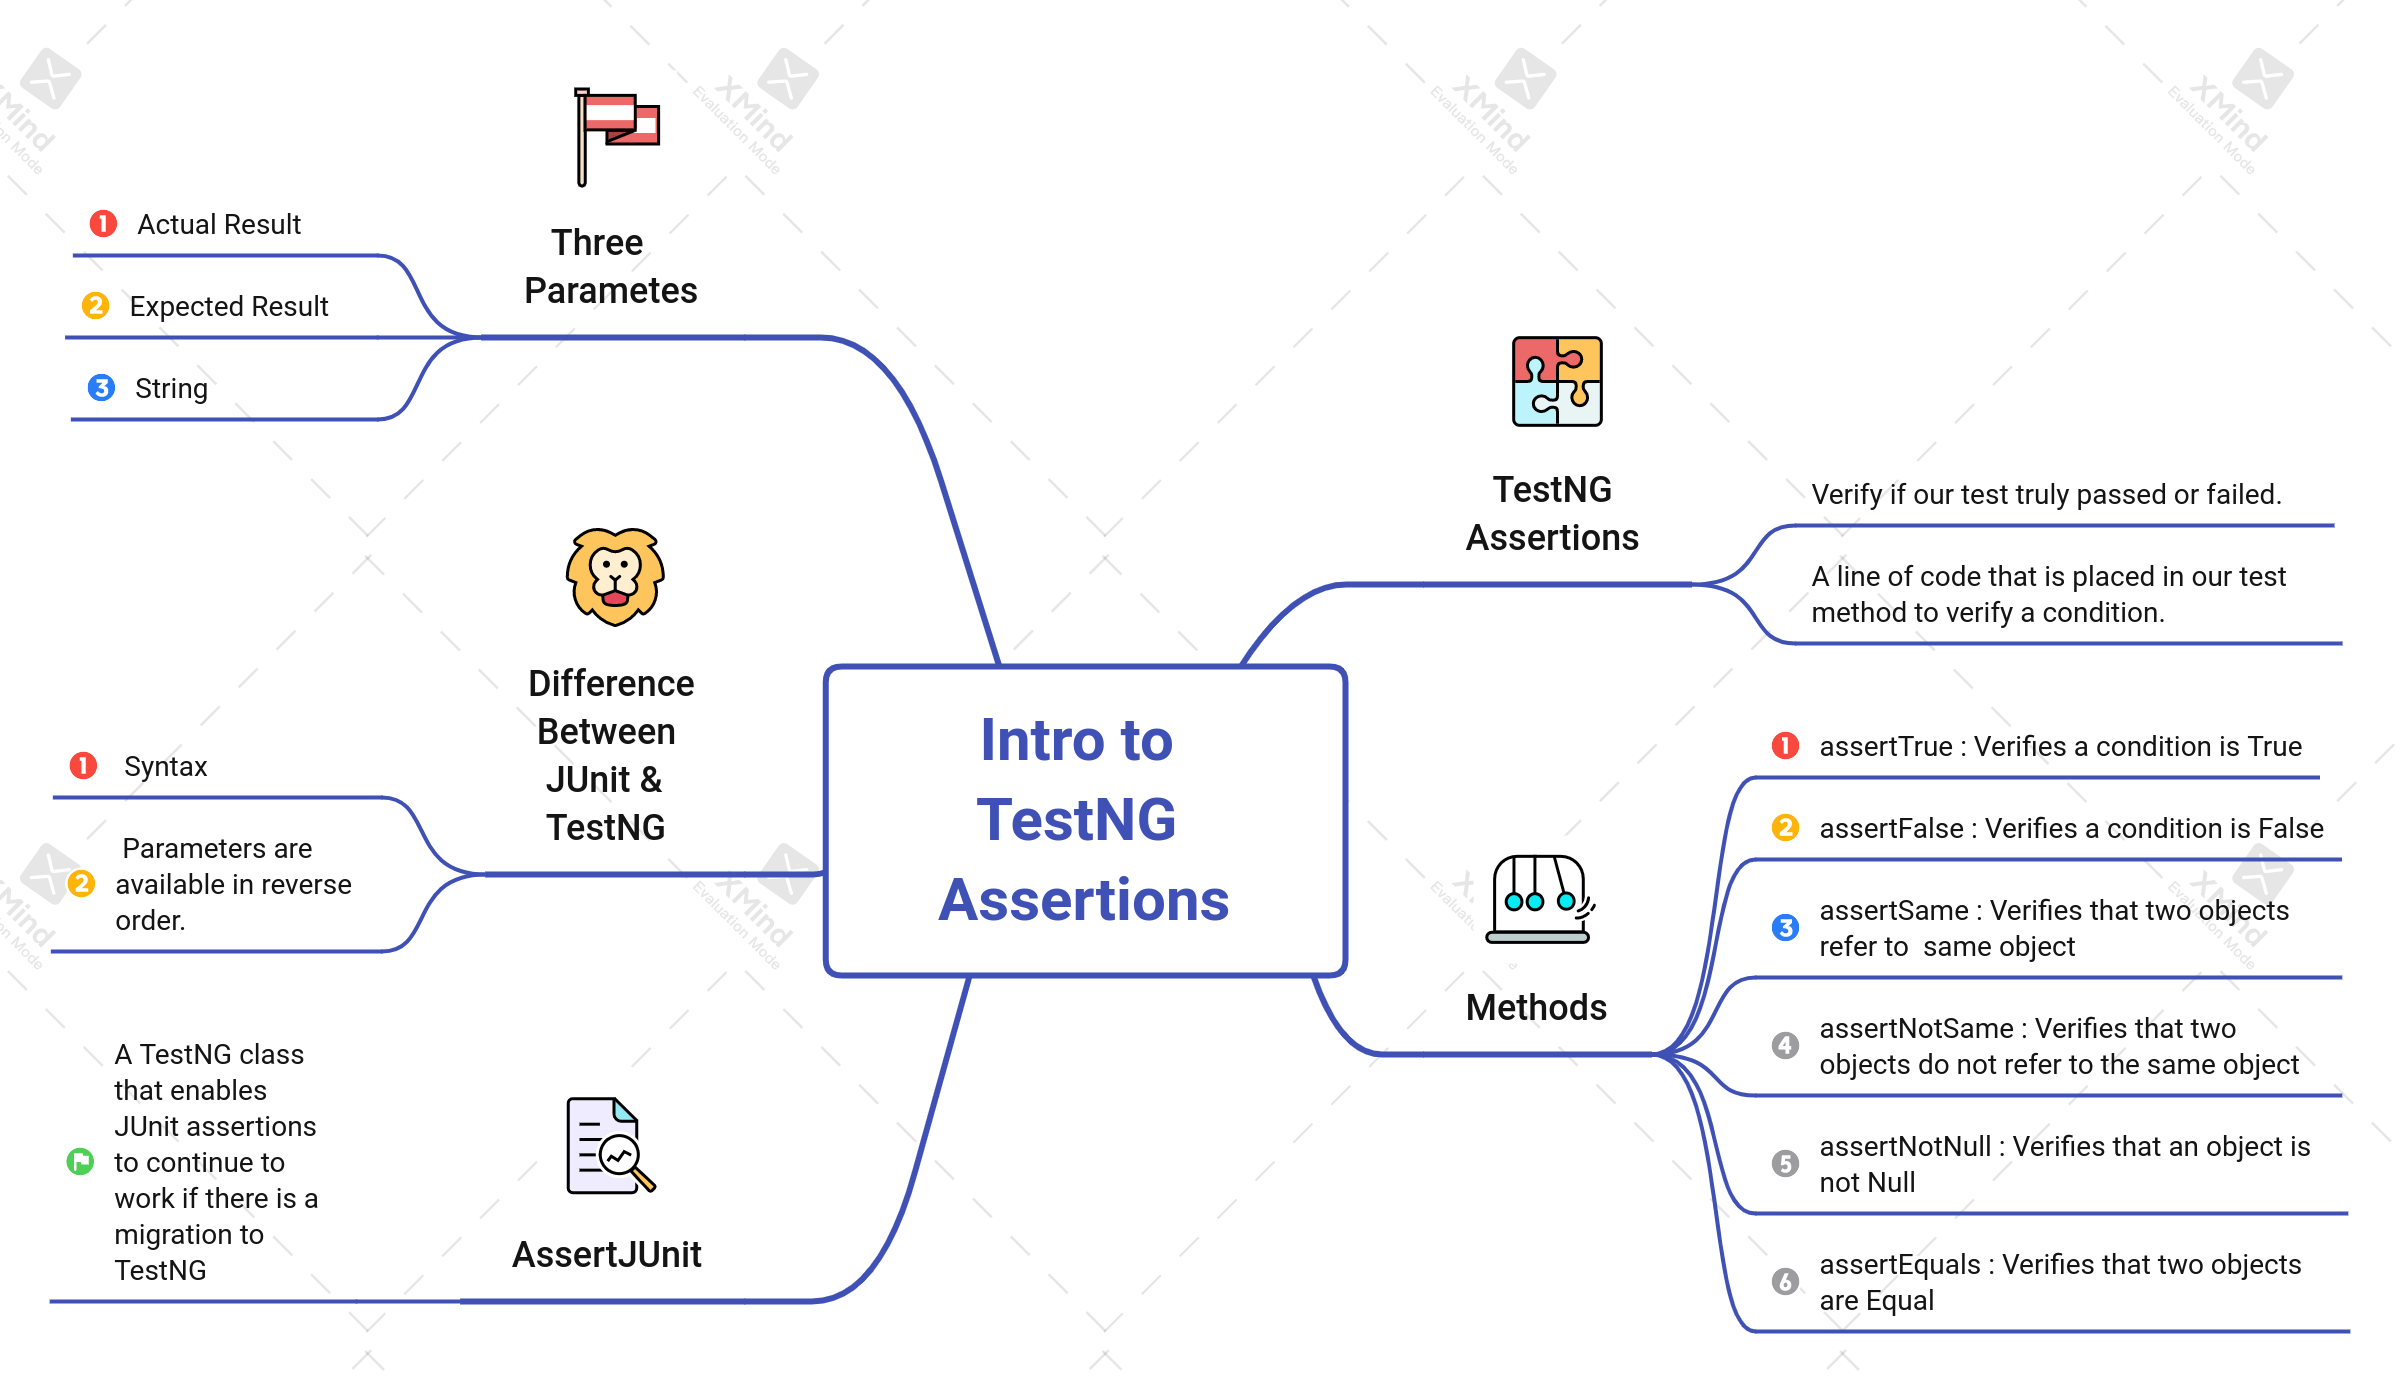
TestNG Assertions :
• Verify if our test truly passed or failed. (Purpose of assertions)
• It’s a line of code that is placed in our test method to verify a condition.
TestNG Assertion Methods :
There are many assertions for TestNG but most of them are overloaded versions of the following methods:
1. assertTrue – verifies a condition is true(assertion method should be used to check if a condition is positive)
2. assertFalse – verifies a condition is false
3. assertSame – verifies that two objects refer to the same object
4. assertNotSame – verifies that two objects do not refer to the same object
5. assertNotNull – verifies that an object is not null
6. assertEquals – verifies that two objects are equal
Generally, all of these TestNG assertions have the same three parameters: actual result, expected result, and a String. It’s the same with JUnit assertions which have an assertion class located in TestNG’s distribution.
JUnit & TestNG Assertions :
JUnit has a class, junit.framework.Assert, that has similar overloaded methods. TestNG turned around and added the same JUnit class, org.testng.AssertJUnit, to its distribution. TestNG added the same class as JUnit to guarantee all assertions keep working if we migrate our test from JUnit to TestNG. TestNG also added another class called org.testng.Assert.
The main difference between JUnit’s class and TestNG’s class is the syntax. Their parameters are available in reverse order. For example, the assertEquals method for JUnit has a String as the first parameter followed by an expected result than an actual result. The same method for TestNG has actual result as the first parameter, expected result as the second parameter then String as the last parameter.
Go to the TestNG Library, maximize the TestNG jar file, select org.testng package, and we see both classes: Assert and AssertJUnit class.
Maximize Assert and there’s a lot of methods. Maximize AssertJUnit and we some of the same overloaded methods (you can see both of these classes in the Resources section below). The methods within our Assert class are considered hard asserts.
AssertJUnit :
A TestNG class that enables JUnit assertions to continue to work if there is a migration to TestNG.
If the assertion fails : assertion message presented to the user.
Hard Asserts :
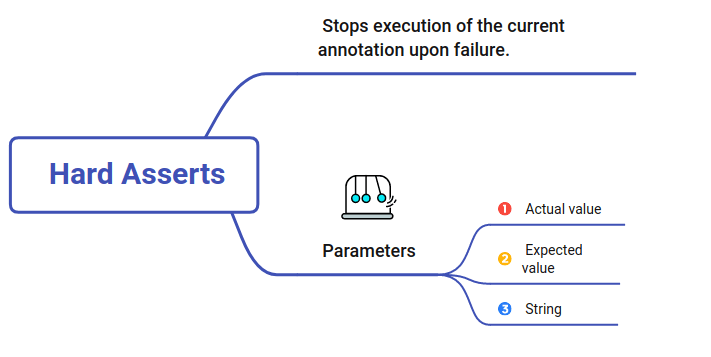
An assertion that stops execution of the current annotation upon failure.
Create new tests with assertions. Our test requirement is to verify the home page for OrangeHRM.
The code will sign in which will take us to the home page. From there, we’ll verify the Welcome hyperlink, Admin tab, and Dashboard.
Let’s add assertions to the testHomePageVerification method. Our first assertion will be assertEquals.
The first parameter represents the actual value. The second parameter represents the expected value. Let’s set those both to true for now, just to see how it works. The third parameter is a String and it represents the message that will show up only in the event of an assertion failure.
Let’s also add assertions assertFalse and assertTrue. Both of these methods accept a boolean condition and an optional String for the message. assertTrue
asserts that the condition is true, and assertFalse asserts that the condition is false.
After running this, we see all tests passed. Now, let’s see what happens when this test fails. Let’s change the condition in the assertEquals and assertTrue methods. I’ll also add print statements after each to demonstrate the flow.
As expected, after running this, testHomePageVerification failed. The AssertionError shows our message “The Welcome Link Is Not Correct On The Home Page” because our test failed. However, this is the only AssertionError shown, even though we know that assertTrue should also fail. There is only one AssertionError because we used a hard assert.
A hard assert stops immediately after a failure then continues on to the next annotation. In this case, assertEquals failed so the subsequent assertions within this method were skipped and the script went on to the next @Test method, userSearch.
To have all assertions within a test evaluated, you can use soft asserts.
Soft Assert :
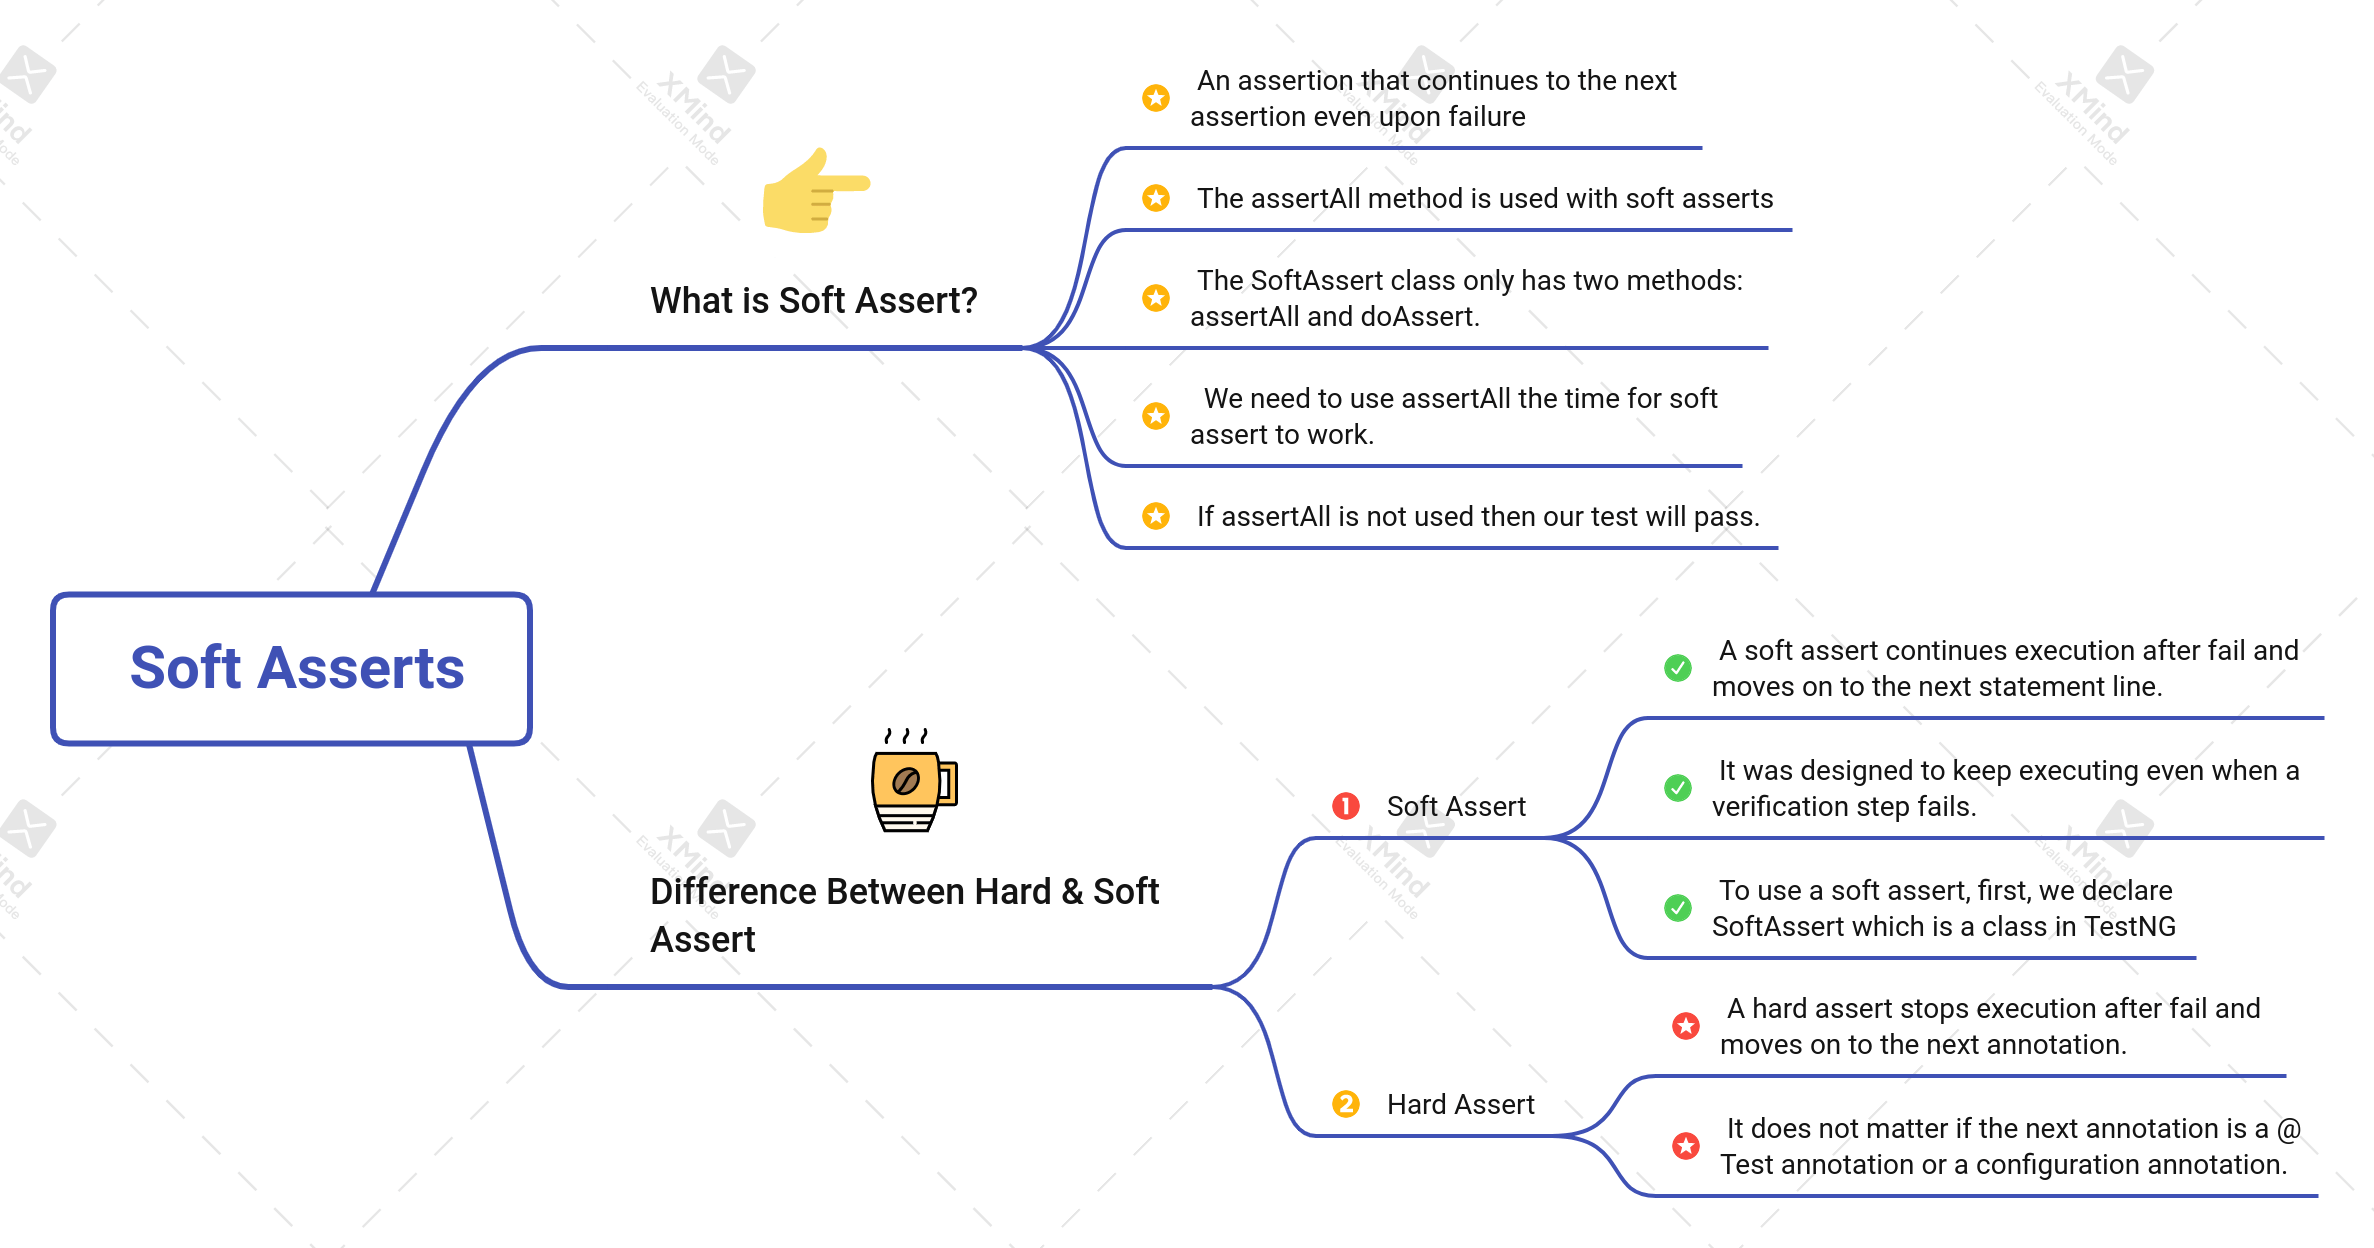
• An assertion that still continues on to the next assertion even upon failure.
• The assertAll method is used with soft asserts
SoftAssert class actually only has two methods : assertAll and doAssert.
• We need to use assertAll every time for soft assert to work.
• If assertAll is not used then our test will pass.
Difference Between Hard Asserts and Soft Asserts :
Hard Asserts :
• A hard assert stops execution after fail and moves on to the next annotation.
• It does not matter if the next annotation is a @Test annotation or a configuration annotation.
Soft Asserts :
– A soft assert continues execution after fail and moves on to the next statement line.
– It was designed to keep executing even when a verification step fails.
– To use a soft assert, first, we declare SoftAssert which is a class in TestNG.Next, we replace all of the Assert references with our object reference softassert. The assertion methods assertEquals, assertFalse, and assertTrue will stay the same.
Intro to Dependency Testing :
Dependency testing :
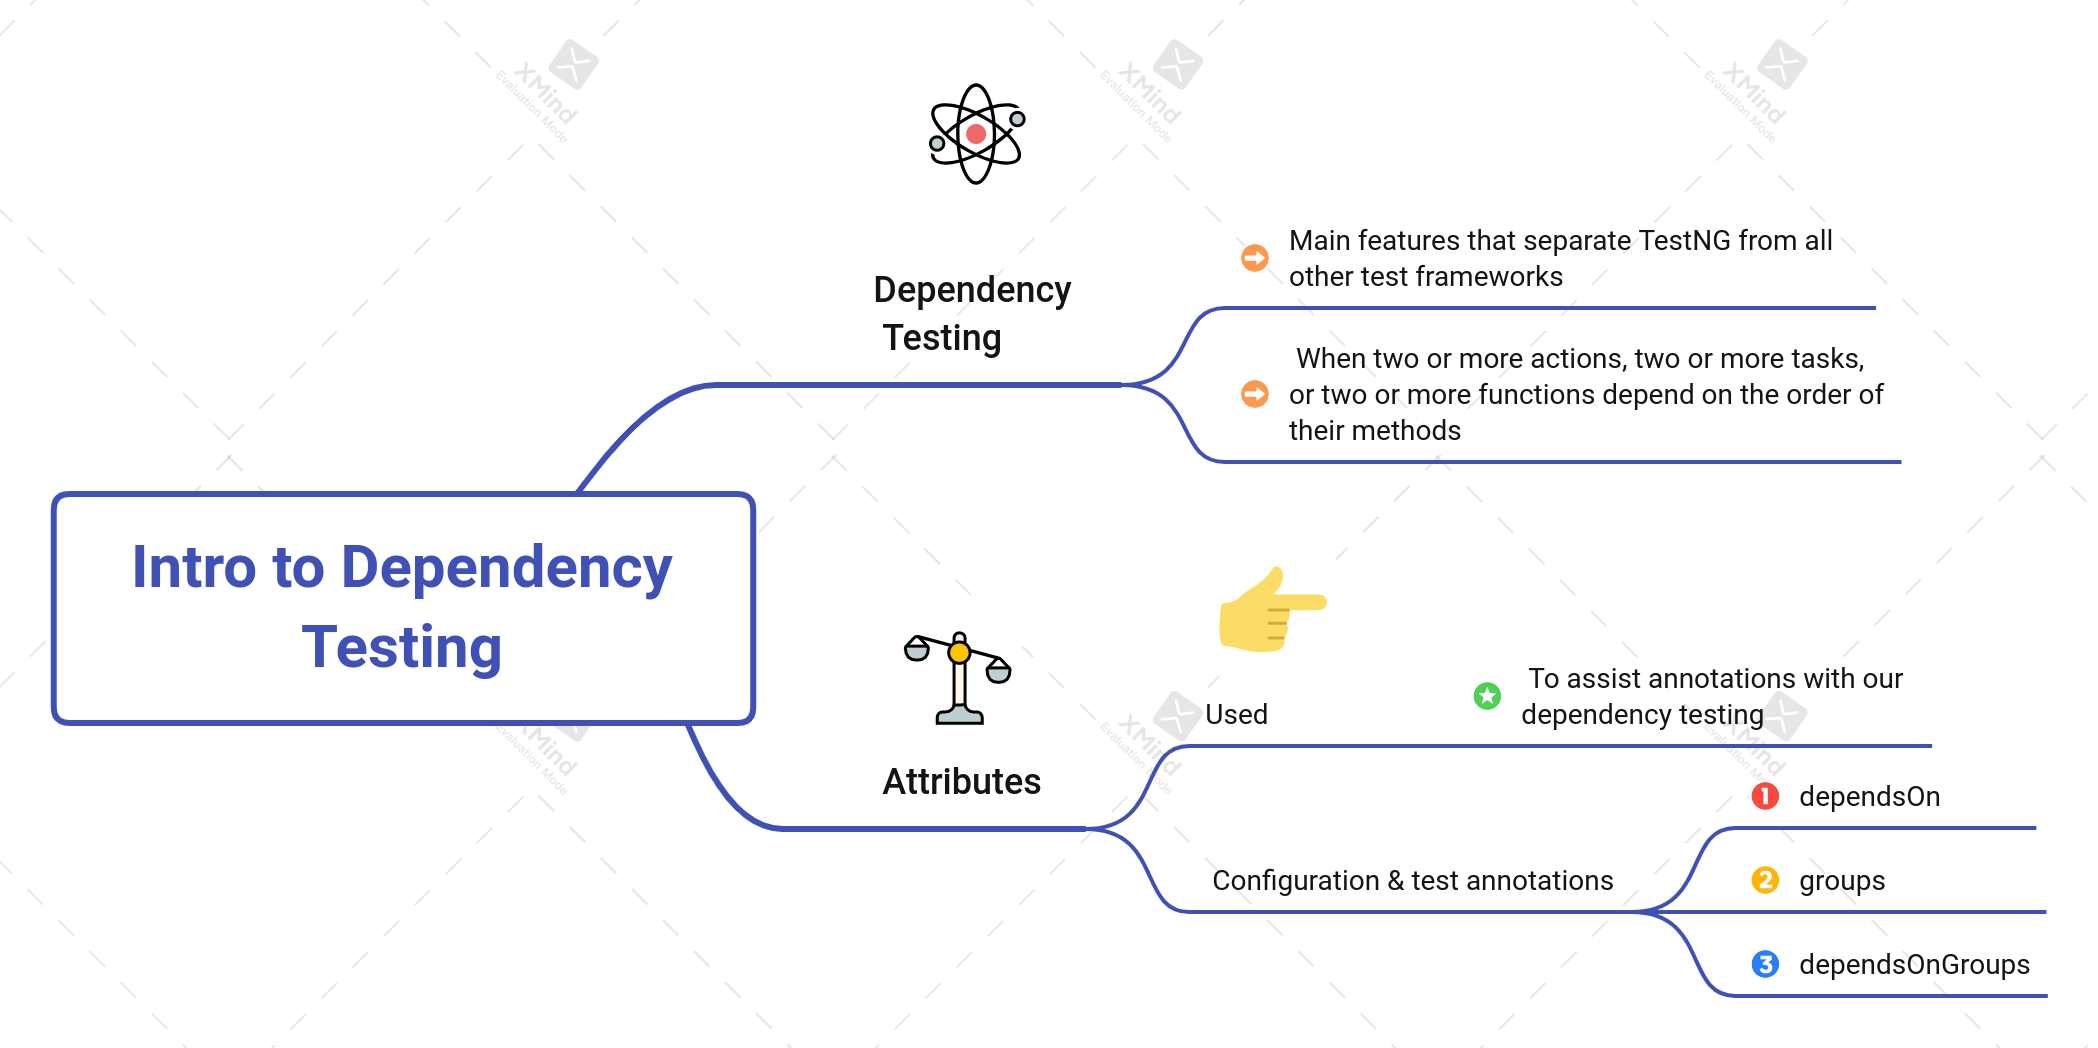
• One of the main features that separate TestNG from all other test frameworks.
• When two or more actions, two or more tasks, or two or more functions depend on the order of their methods.
One of their arguments stated that as soon as test methods depend on other test methods, it becomes hard to run those methods in isolation. That argument was true until TestNG.
Now, we are allowed to run test methods in isolation and part of a dependency. TestNG provides a way to clearly indicate those dependencies. Therefore, it has no problem considering the requirements for any test method we want to run in isolation.
Attributes are used to assist annotations with our dependency testing. All three of these attributes can be placed in the configuration and test annotations:
• dependsOn
• groups
• dependsOnGroups
The test methods depend on the configuration annotations. If a configuration annotation fails then the test methods would not pass.
Execute with dependsOnMethods Attribute :
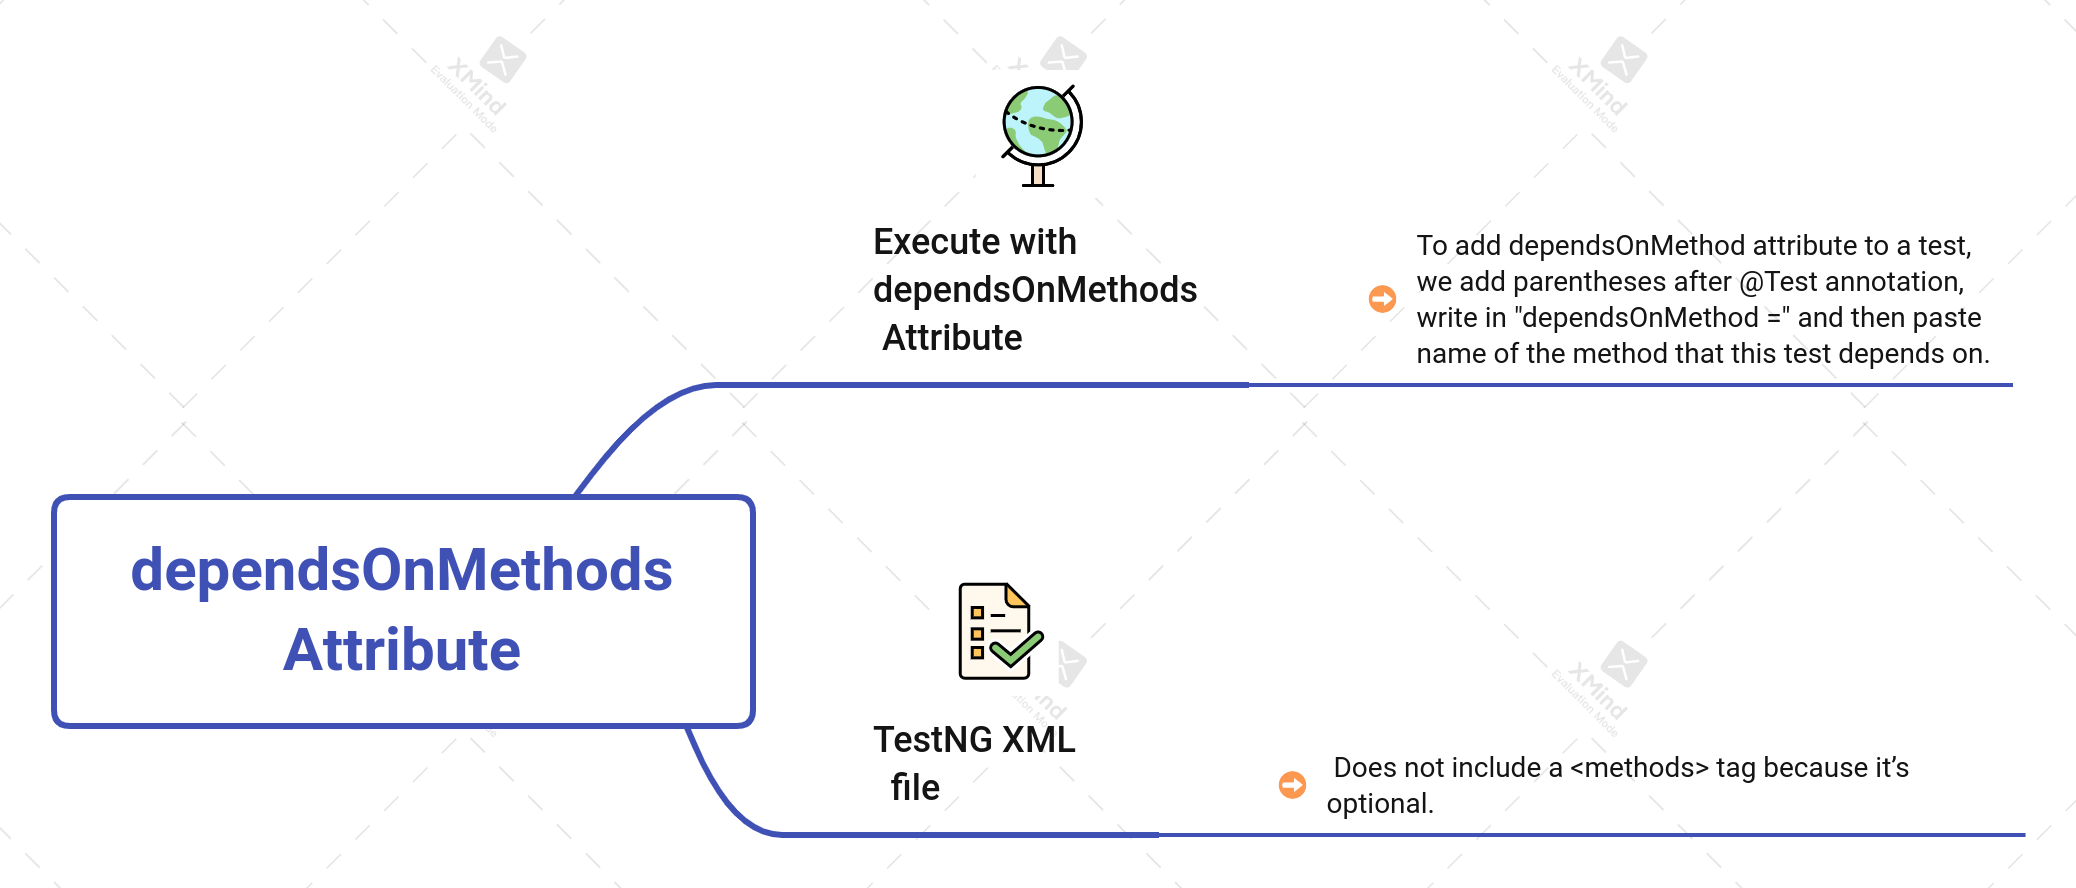
To add the dependsOnMethod attribute to a test, we add parentheses after the @Test annotation, write in “dependsOnMethod =” and then paste the name of the method that this test depends on.
By default, a TestNG XML file does not include a <methods> tag because it’s optional.
Let’s imagine, everyone in the organization knows that searching for a user is not working. The defect has been reported and we will add it back to our test suite once the defect has been resolved. In the meantime, we don’t have to keep executing that test. We can exclude it for now.
groups and dependsOnGroups Attributes :
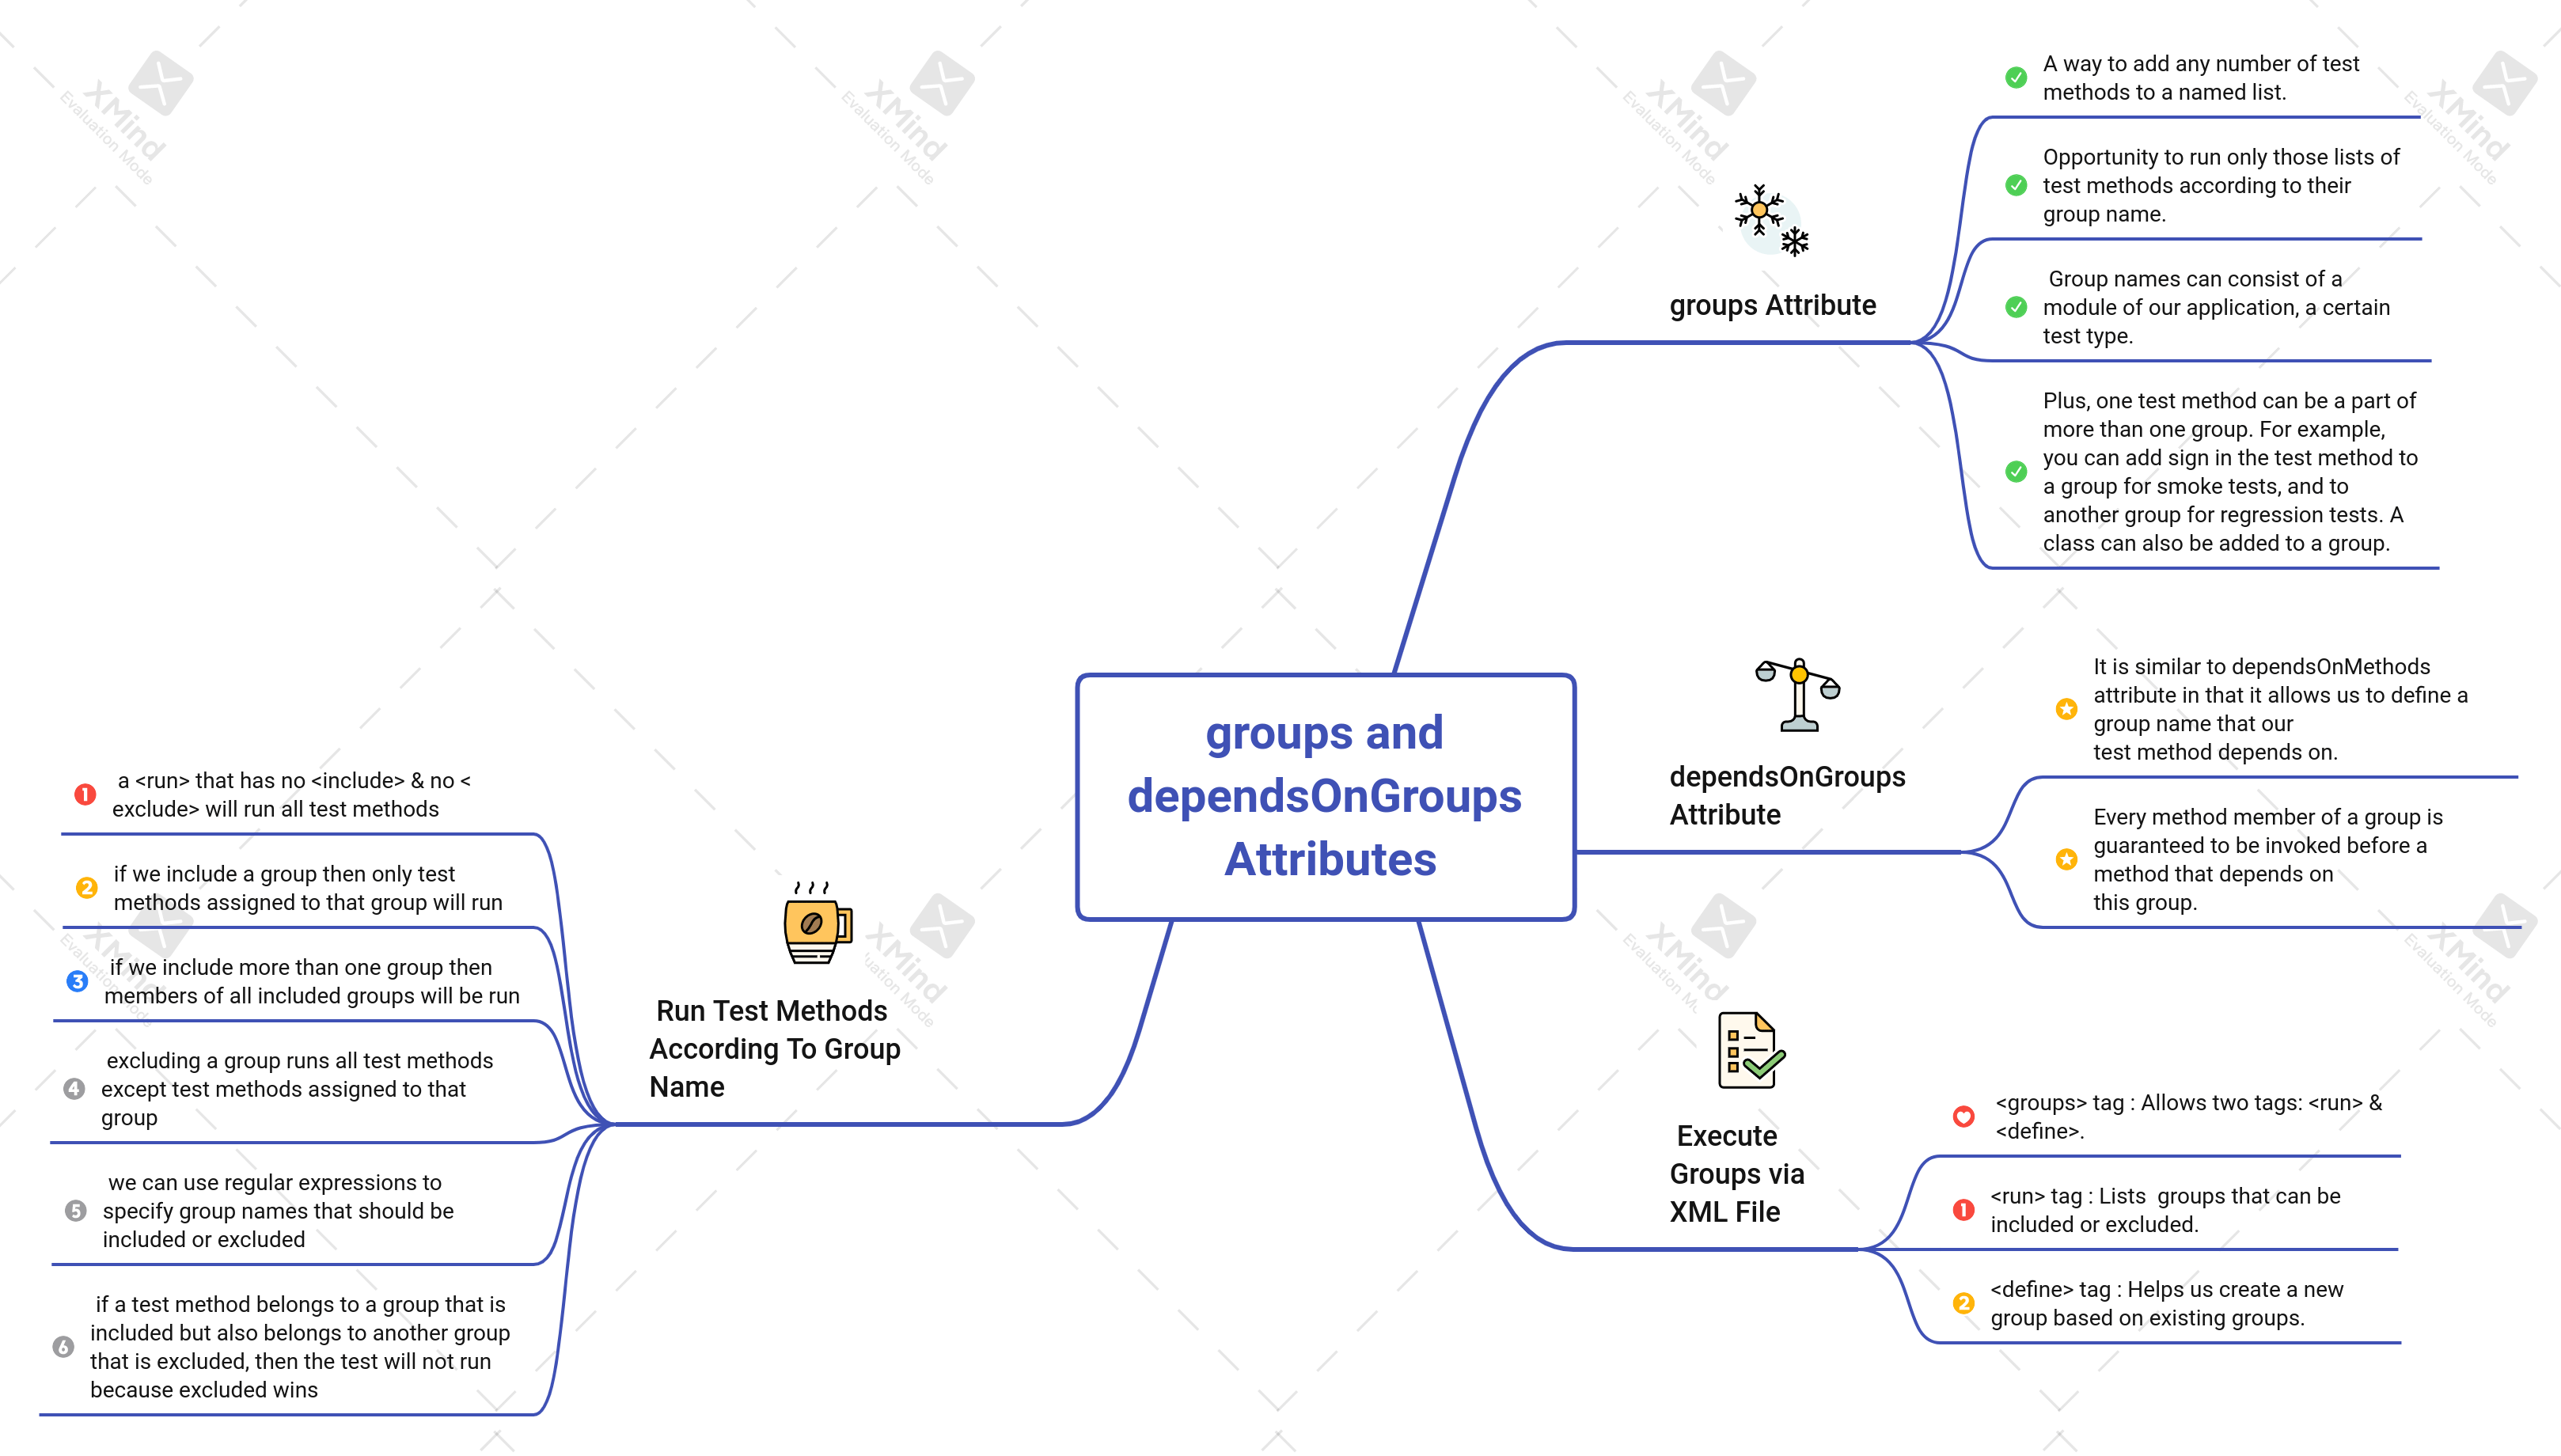
groups Attribute :
• A way to add any number of test methods to a named list.
• This feature is beneficial because it’s an opportunity to run only those lists of test methods according to their group name.
• The group names can consist of a module of our application, a certain test type, or whatever else we decide.
• Plus, one test method can be a part of more than one group. For example, you can add the sign-in test method to a group for smoke tests, and to another group for regression tests. A class can also be added to a group.
dependsOnGroups Attribute :
• It is similar to the dependsOnMethods attribute in that it allows us to define a group name that our test method depends on.
• Every method member of a group is guaranteed to be invoked before a method that depends on this group.
Execute Groups via XML File :
TestNG provides a few ways to run groups at runtime. The main way is to use an XML file but we can also use the command line or Ant.
<groups> tag :
The <groups> tag allows two tags : <run> and <define>.
• The <run> tag : lists the groups that can be included or excluded. This file does not include or exclude any groups. Therefore, all groups will show up.
• The <define> tag : helps us create a new group based on existing groups.
Notice only the tests that were a part of the regression group were executed because this is what we specified in our XML file. These methods happen to be a part of other groups as well, but they were only executed because they belong to the regression group.
In the XML file, we can include more than one group. This example includes the smoke and system groups, which include three methods from our class.
Run Test Methods According To Group Name :
Let’s recap the rules we covered when executing groups at runtime:
• A <run> that has no <include> and no <exclude> will run all test methods.
• If we include a group then only test methods assigned to that group will run.
• If we include more than one group then members of all included groups will be run.
• Excluding a group runs all test methods except the test methods assigned to that group.
• We can use regular expressions to specify group names that should be included or excluded.
• If a test method belongs to a group that is included but also belongs to another group that is excluded, then the test will not run because excluded wins.
Up to this point, all of the test methods that we executed were from the same class. However, TestNG is not limited to executing a group using one class. We can execute groups using more than one class or even a package.
This XML file has two <class> tags.
When we run this, all test methods that belong to these two groups and are within these two classes are executed.
Data-Driven Testing :
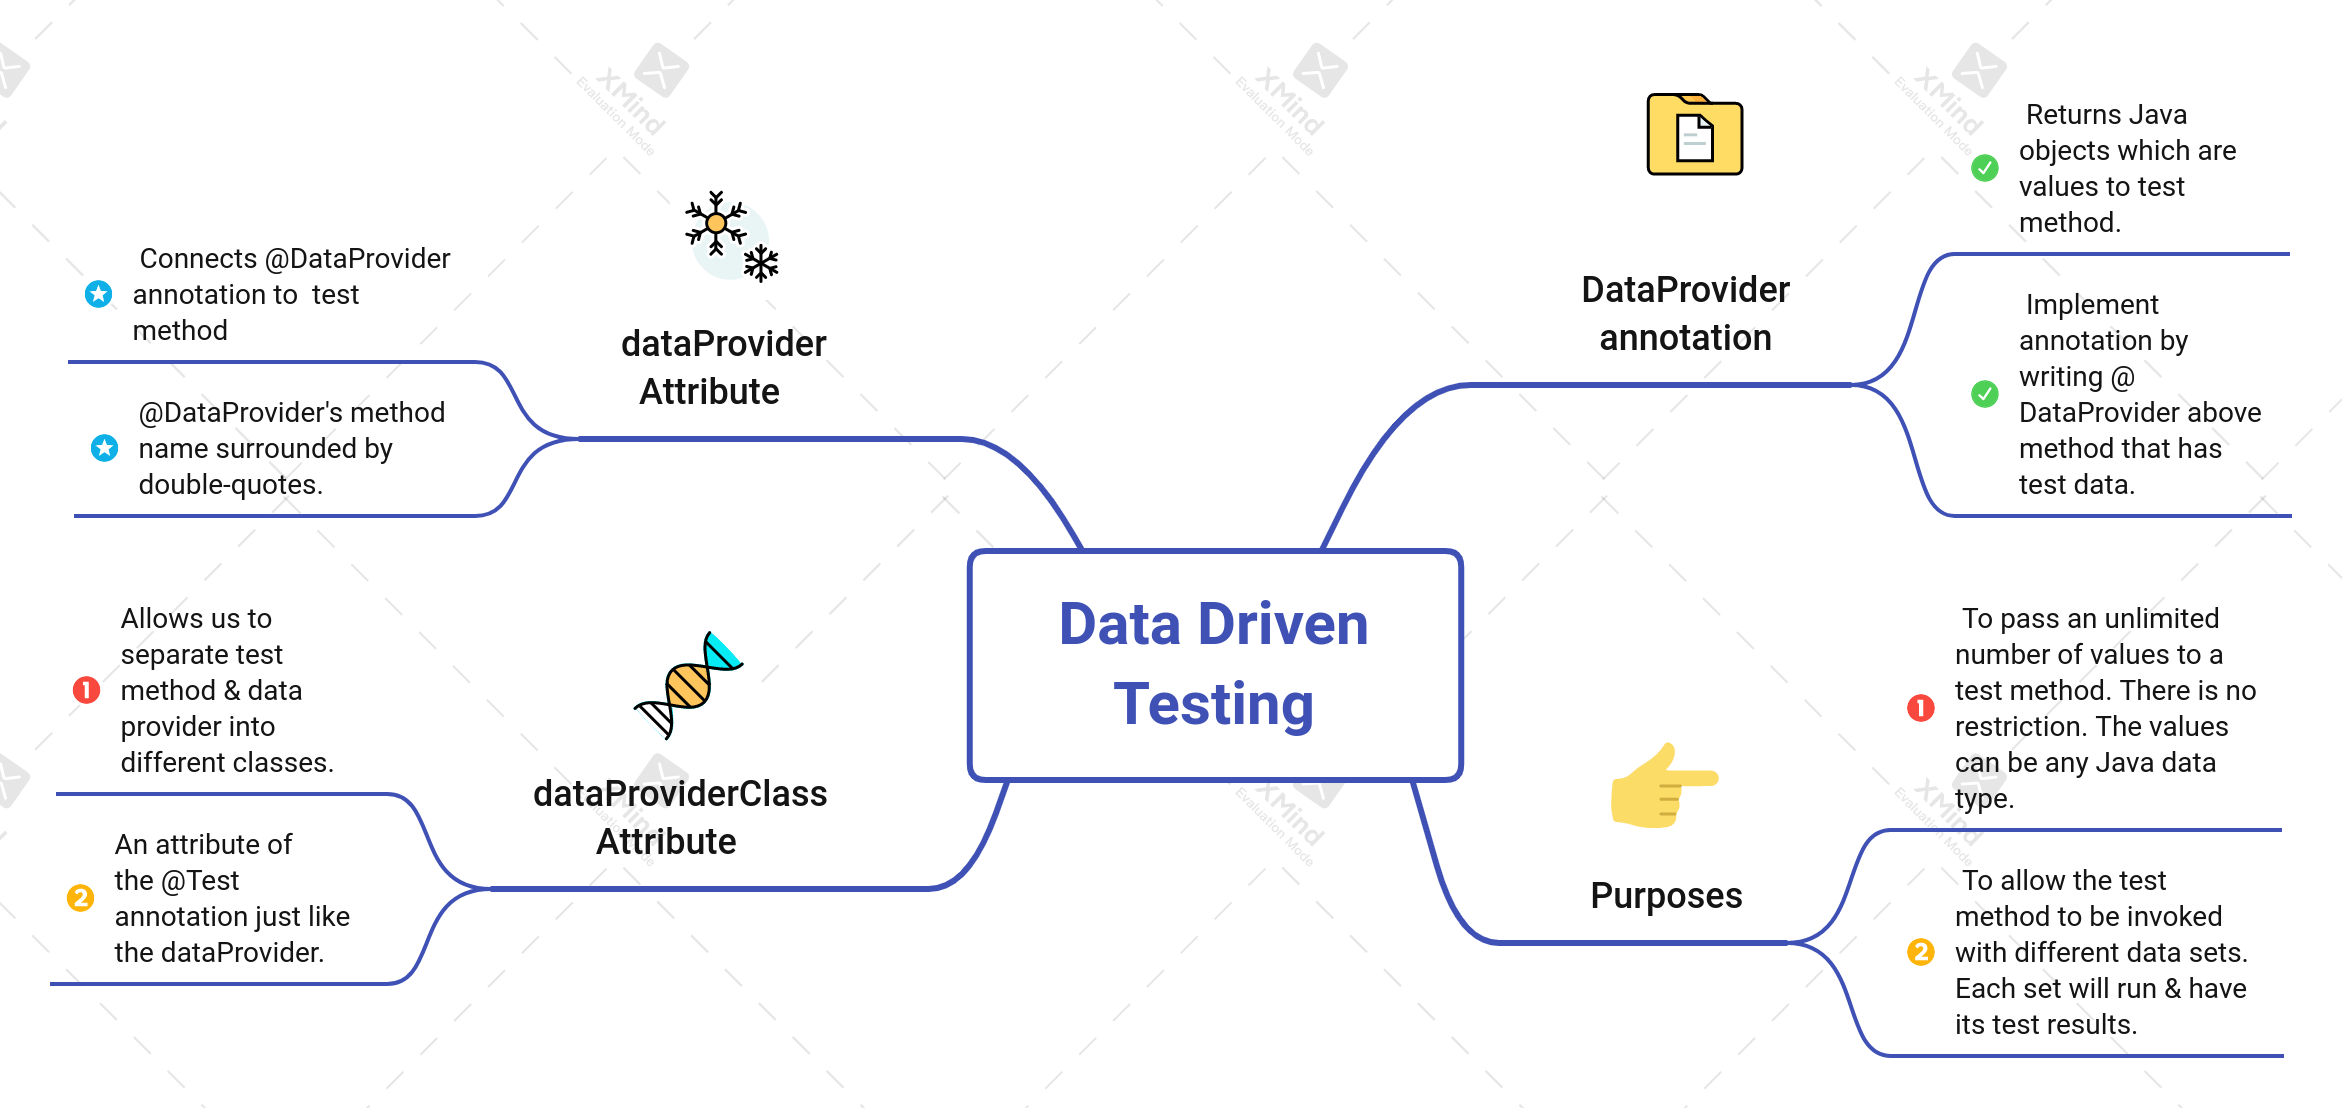
DataProvider annotation :
The @DataProvider annotation returns Java objects which are values to the test method. We implement this annotation by writing @DataProvider above the method that has the test data.
Purposes :
• To pass an unlimited number of values to a test method. There is no restriction. The values can be any Java data type.
• To allow the test method to be invoked with different data sets. Each set will run and have its own test results.
dataProvider Attribute :
The dataProvider attribute connects the @DataProvider annotation to the test method. This is how both methods converse with each other. Since it’s an attribute of the @Test annotation, we write dataProvider with a lowercased and set it equal to the @DataProvider’s method name surrounded by double-quotes.
dataProviderClass Attribute :
• It allows us to separate the test method and data provider into different classes.
• It is an attribute of the @Test annotation just like the dataProvider.
Cross-Browser Testing :
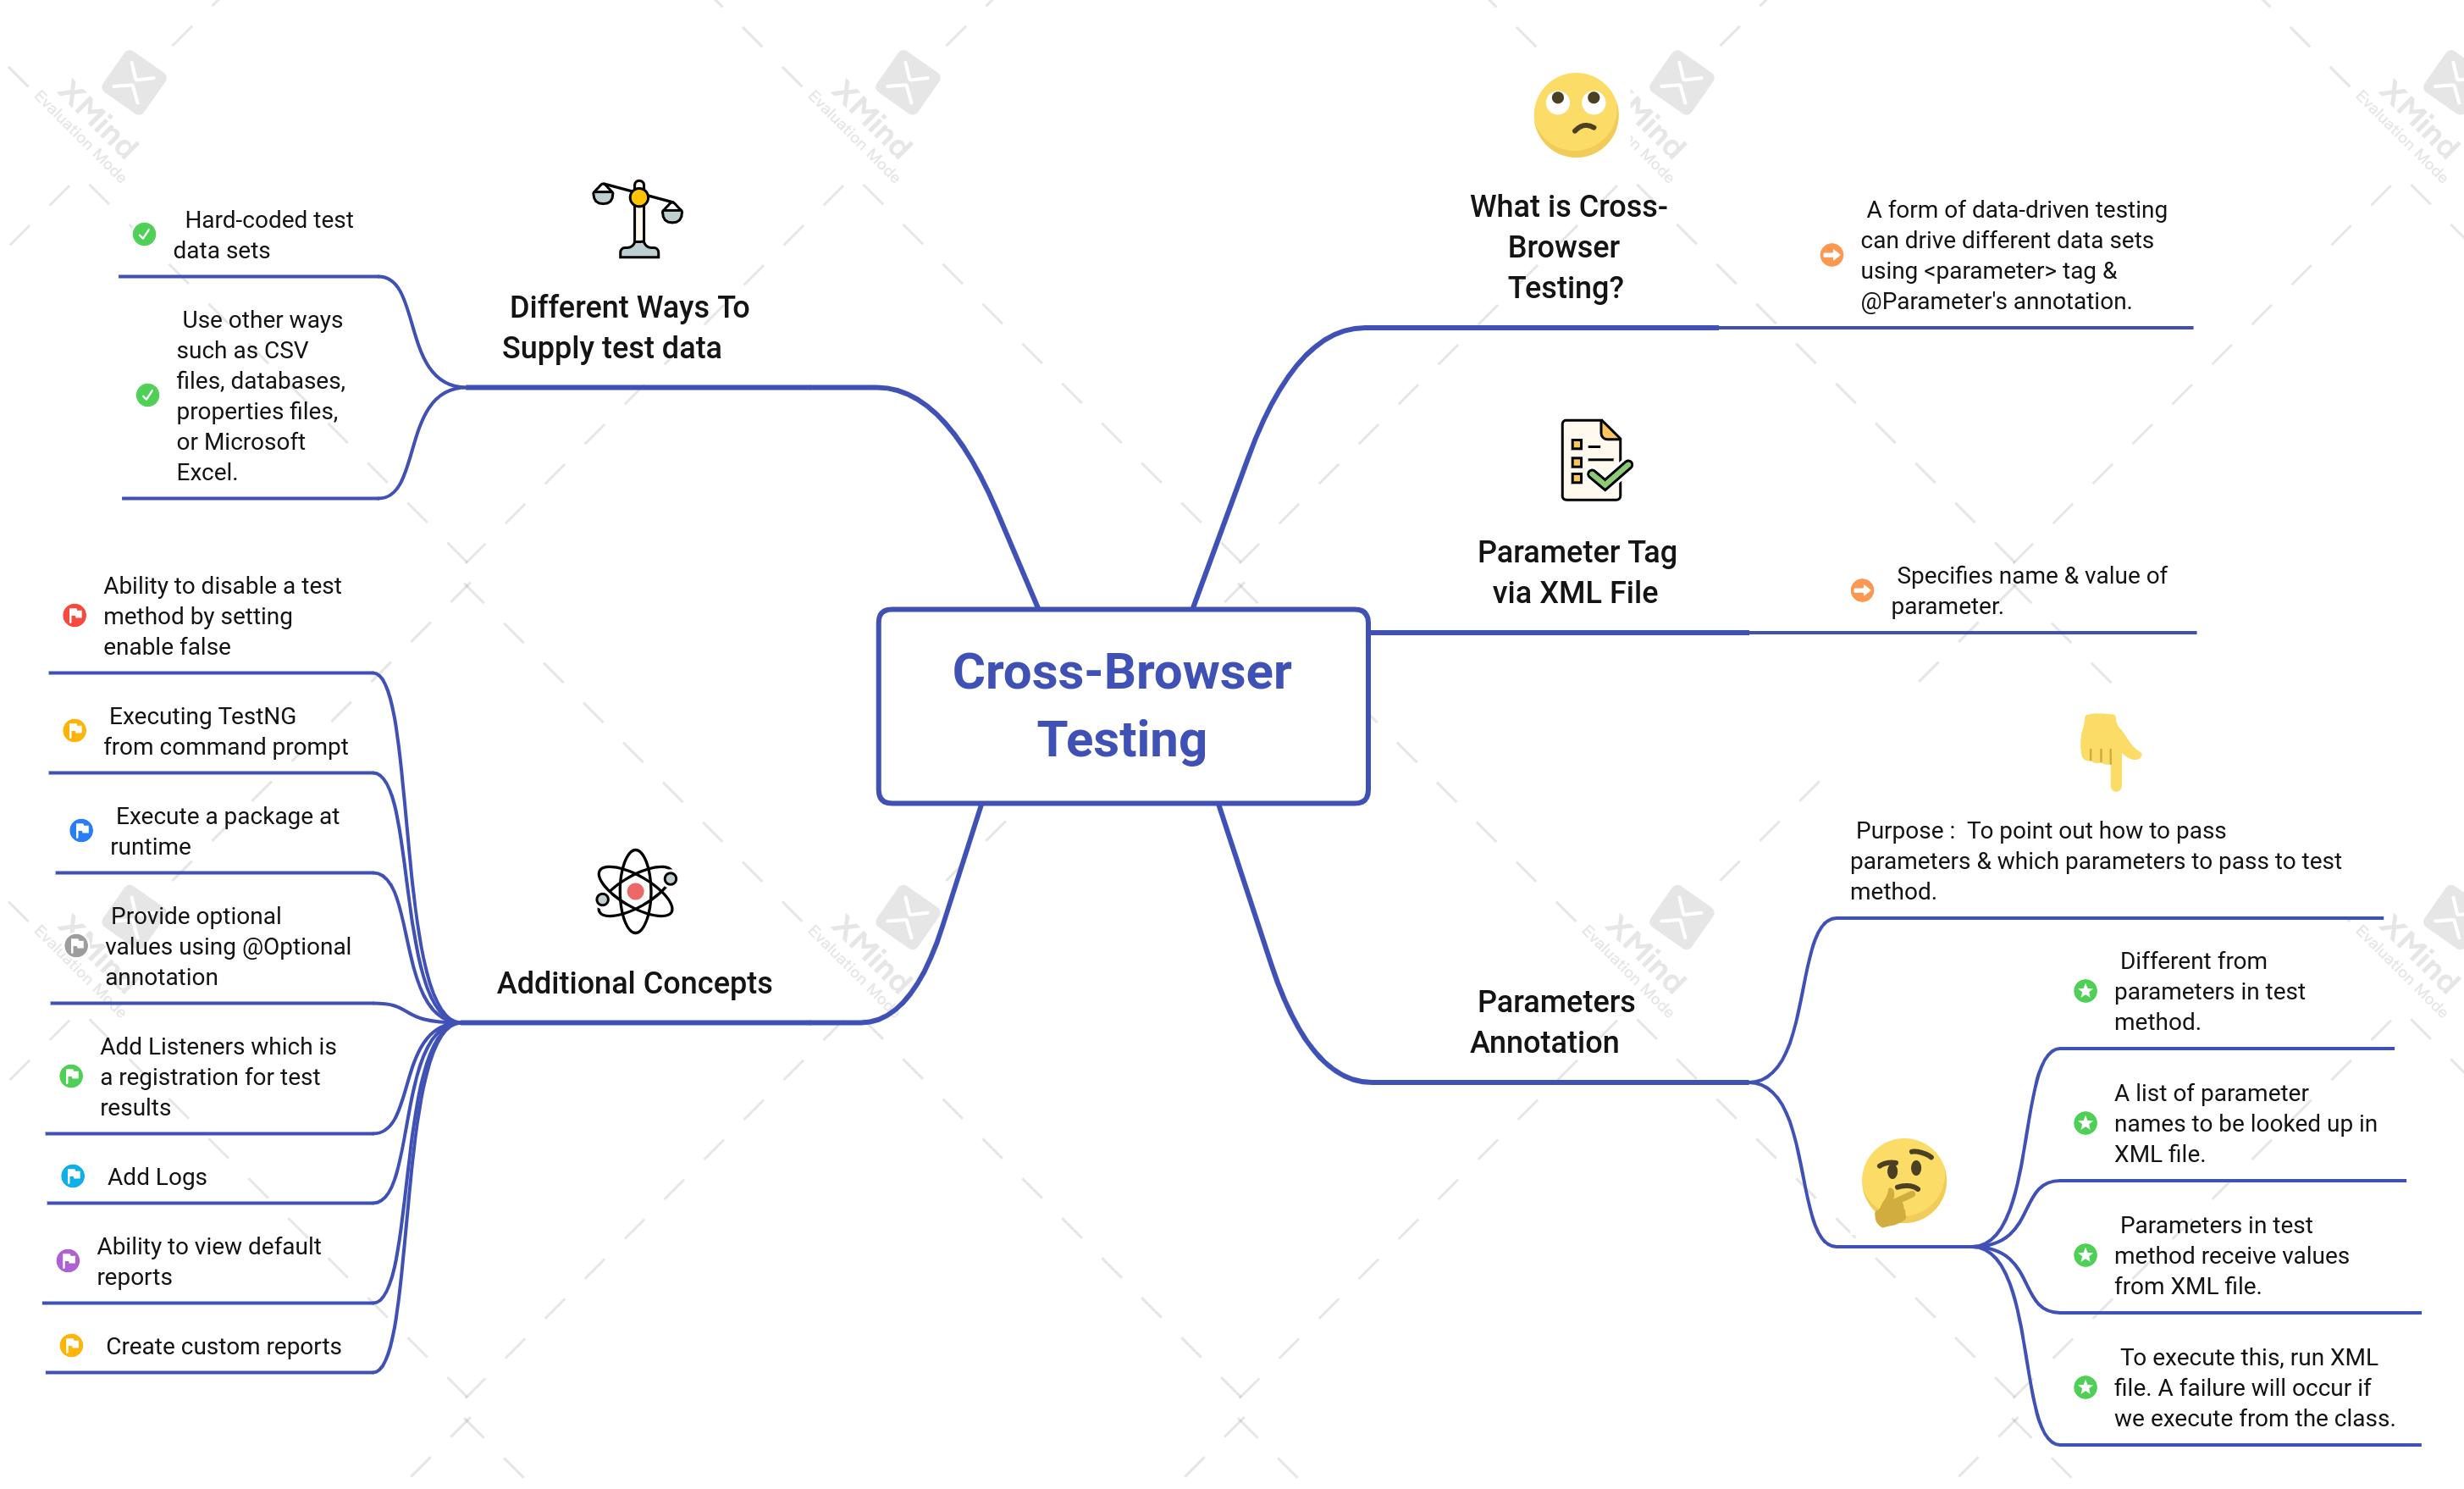
Cross-browser testing is a form of data-driven testing because we can drive different data sets using the <parameter> tag and@Parameters` annotation.
Parameter Tag via XML File :
The <parameter> tag specifies the name and value of a parameter.
We have the option of placing the <parameter> tag within the <suite> level or <test> level. The <parameter> tag will get overridden at the <test> level if we add the tag in both places with the same parameter name. This is because the <test> level is the closest to the <class> level which uses the parameter name. I decide the level to place the parameter name and value by determining if all classes need the same value. If all classes need the same value then I add the <parameter> tag at the suite level. If the classes require a unique value then I add the <parameter> tag at the test level.
Next, is the <test> level. The parameter name will be the same for each test but the values are going to be different. Let’s start with a test on IE. The parameter name is BrowserType and the value is InternetExplorer. This test will use Internet Explorer as a browser.
Parameters Annotation :
The purpose of a @Parameters annotation is to point out how to pass parameters and which parameters to pass to the test method.
We are going to pass the URL and BrowserType from the XML to the @Parameters annotation. The value we write in this annotation must match the parameter name from the XML file. The parameter names are URL and BrowserType.
Parameters in the annotation are different from parameters in the test method. Parameters in the annotation are a list of parameter names to be looked up in the XML file. Parameters in the test method receive the values from the XML file.
Therefore, one gets the parameter name and the other one gets the parameter value.
Let’s add code to this method to instantiate the proper driver based on the browser specified.
To execute this, we must run the XML file. A failure will occur if we execute from the class.
Different Ways To Supply test data :
We hard-coded our test data sets. However, we can also use other ways to supply our test data such as CSV files, database, properties files, or Microsoft Excel. All of the ways have their pros and cons.
Additional Concepts :
• The ability to disable a test method by setting enable to false
• Execute a package at runtime
• Executing TestNG from the command prompt
• Provide optional values using the @Optional annotation
• Add Listeners which is a registration for test results
• Add Logs
• And the ability to view default reports
• Create custom reports
Multithreading executes multiple components of a program at the same time and there are more TestNG concepts available to us.
To specify the name and value of a variable to be used within tests is the purpose of the <parameter> tag within the XML file.
If <parameter> tag with the same name appears within both the suite and the test, the value specified within the test will be used.
When the parameter will be used by multiple tests use a parameter at the suite level.
Via the Parameters annotation, the value from a <parameter> tag gets passed to the test method.
References :
2. https://testautomationu.applitools.com/
3. https://testautomationu.applitools.com/introduction-to-testng/
TestNG Xmind References :
1. https://www.xmind.net/m/ayDnTG
2. https://www.xmind.net/m/Bbzdra
3. https://www.xmind.net/m/KGhQQf
4. https://www.xmind.net/m/rWbLQU
5. https://www.xmind.net/m/LewV7B
6. https://www.xmind.net/m/rX9WZX
7. https://www.xmind.net/m/nHP9e9
8. https://www.xmind.net/m/4pHB6N
9. https://www.xmind.net/m/d9F48L
10. https://www.xmind.net/m/VaFwrZ
11. https://www.xmind.net/m/PfNL47
12. https://www.xmind.net/m/RskyAx
13. https://www.xmind.net/m/7xMTSn
Happy Learning 🙌

About Author
Prachi is a QA engineer, experienced in web and desktop applications, and always looking to improve her automation skills and knowledge. Her current focus is automation testing with java.
Currently working with RELFOR LABS PVT. LTD. as a quality assurance engineer. she is a member of The test tribe community. She is also honored with Lila Poonawalla Scholarship & Training for Computer Engineering.
LinkedIn – https://www.linkedin.com/in/prachi-dahibhate-884418189
Twitter – https://twitter.com/dahibhateprachi